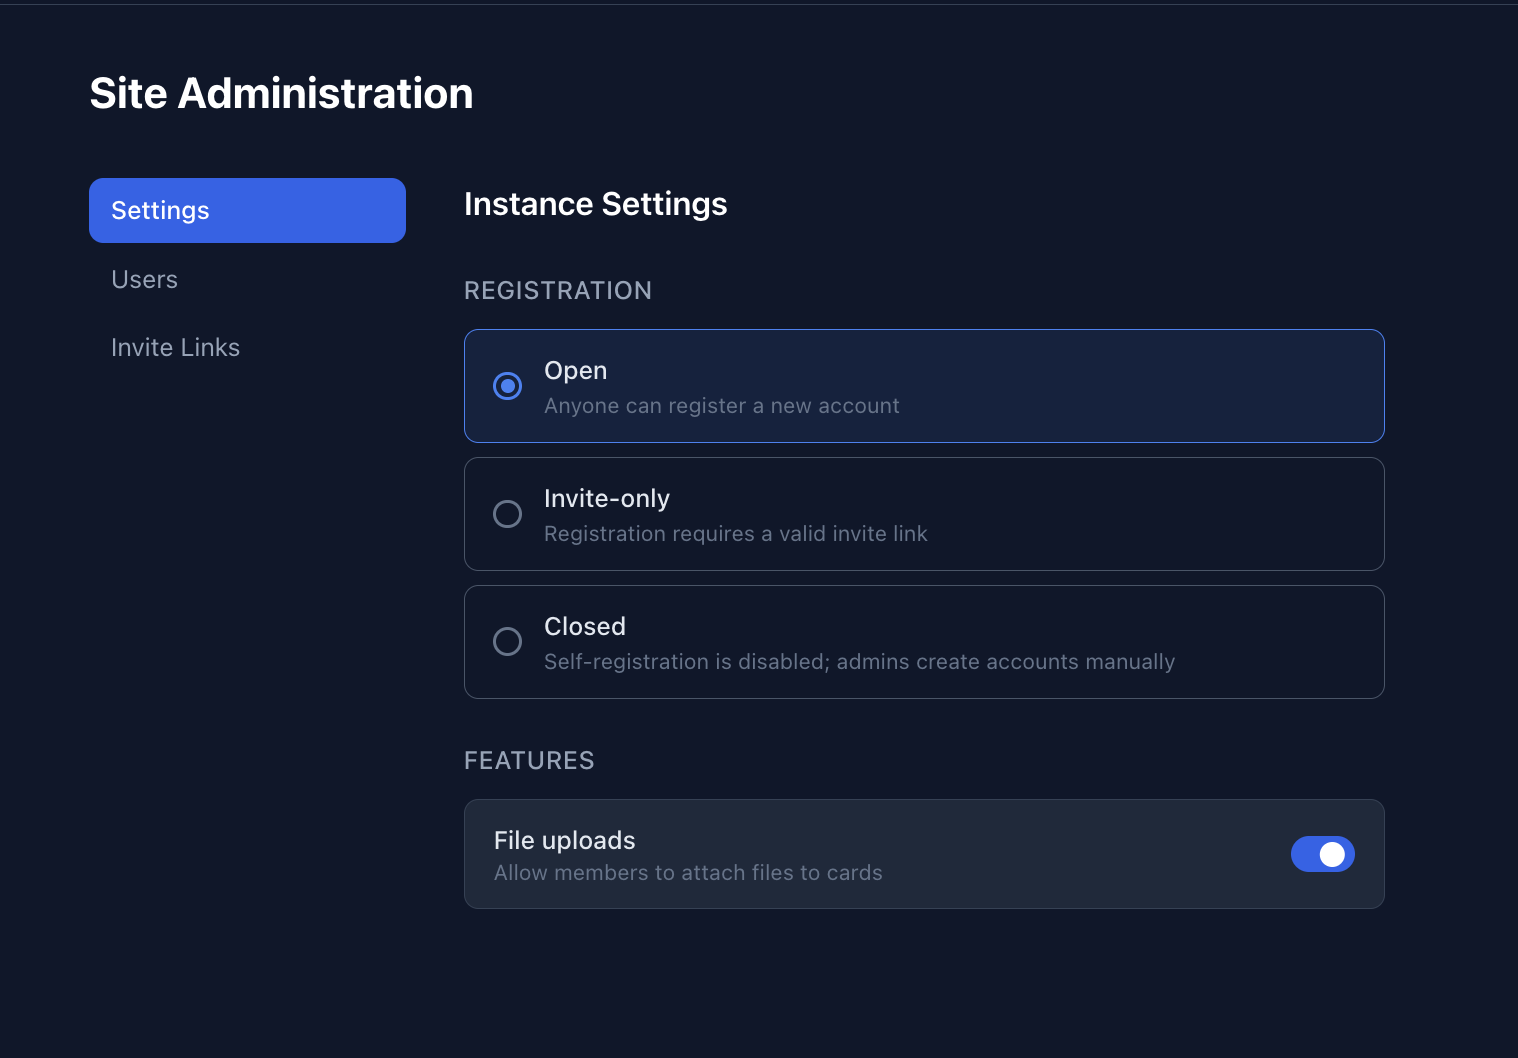
Self-Hosting
Your data. Your server. Your rules.
Visiban is designed for self-hosting from day one. One command brings up Postgres, Redis, and a reverse proxy — nothing leaves your infrastructure.
Requirements
A Linux server with Docker and Docker Compose v2. Minimum 2 vCPU / 4 GB RAM / 40 GB SSD — 1 GB will OOM under load.
Quick start
- 1
Clone the repo
$ git clone --branch v1.1.0 https://gitlab.com/visiban/visiban && cd visiban - 2
Configure environment
$ cp .env.example .env
# Edit .env — set DJANGO_SECRET_KEY and SITE_DOMAIN at minimum
- 3
Start the stack
$ docker compose up --build -d
- 4
Retrieve the one-time admin password
$ docker compose exec backend cat /tmp/visiban_admin_password - 5
Open the app
# Visit http://localhost:5173 and sign in with the password above
Docker image tags
Visiban publishes images to GHCR (ghcr.io/visiban/visiban). Three tag strategies are available depending on how much control you want over updates.
:stable recommended Current stable release
Always points to the latest stable release. Moves forward as new stable versions ship (1.0 → 1.1 → 2.0). Never updated with release candidates. Recommended for production.
:1.1Minor release pin
Stays on the 1.1.x patch line even after 1.2 ships. Use this when you want to control when you take a minor upgrade.
:latestMost recent release
Tracks the newest published image including release candidates. Useful for staying on the bleeding edge.
Production deployment
For production, use docker-compose.prod.yml — it adds an Nginx reverse proxy, serves the built frontend as static files, and uses daphne (ASGI) for WebSockets.
Set APP_VERSION in your .env to control which image is pulled — use the stable alias to receive patch updates automatically:
# .env — "stable" always tracks the current stable release (recommended)
APP_VERSION=stable

# Pin to a minor line to control when you take minor upgrades
# APP_VERSION=1.1

# Or pin to an exact version for fully reproducible deploys
# APP_VERSION=v1.1.0
$ docker compose -f docker-compose.prod.yml up --build -d
.env before starting. Missing any one causes API failures or a WebSocket stuck on Reconnecting.
ALLOWED_HOSTS— your hostname or IPCORS_ALLOWED_ORIGINS— full origin the browser usesSITE_DOMAIN— hostname for OAuth callbacksFRONTEND_URL— full URL allauth redirects to after OAuth
TLS termination can be handled by Nginx with Let's Encrypt — see the full installation guide for the complete checklist.
Kubernetes / Helm
A Helm chart is included under helm/visiban/.
$ helm dependency update helm/visiban
$ cp helm/visiban/values.secret.yaml.example helm/visiban/values.secret.yaml
# Edit values.secret.yaml — set djangoSecretKey and postgres password
$ helm install visiban helm/visiban \
    --namespace visiban --create-namespace \
    -f helm/visiban/values.secret.yaml \
    --set image.tag=stable \
    --set ingress.host=boards.example.com \
    --set backend.settings.allowedHosts=boards.example.com \
    --set backend.settings.corsAllowedOrigins=https://boards.example.com \
    --set backend.settings.frontendUrl=https://boards.example.com \
    --set backend.settings.siteDomain=boards.example.com
After install, retrieve the one-time admin password:
$ kubectl exec -n visiban $(kubectl get pods -n visiban \
    -l app.kubernetes.io/component=backend -o jsonpath='{.items[0].metadata.name}') \
    -- cat /run/visiban/admin_password
Need the complete guide? The docs cover upgrades, backups, OAuth setup, and every environment variable.
Read the full docs →